How to
How to start
Thank you for your interest in Kraga models.
Although one of the main goals was to create design which is printable on every printer, it may happen that your software or printer is not able to print it.
It is very important to start with the printing of a test part. You can find link to it on every plane detail page.
After you printed the test part, you can proceed to purchase using PayPal or credit card. All your plans and detailed build guide are availabe for download under
my account section.
Then you can print your plane, assembly it, cover it with covering foil,
install electronics and finally enjoy flying. In following chapters you can find high level overview.
How to print
There are two kinds of parts:
←
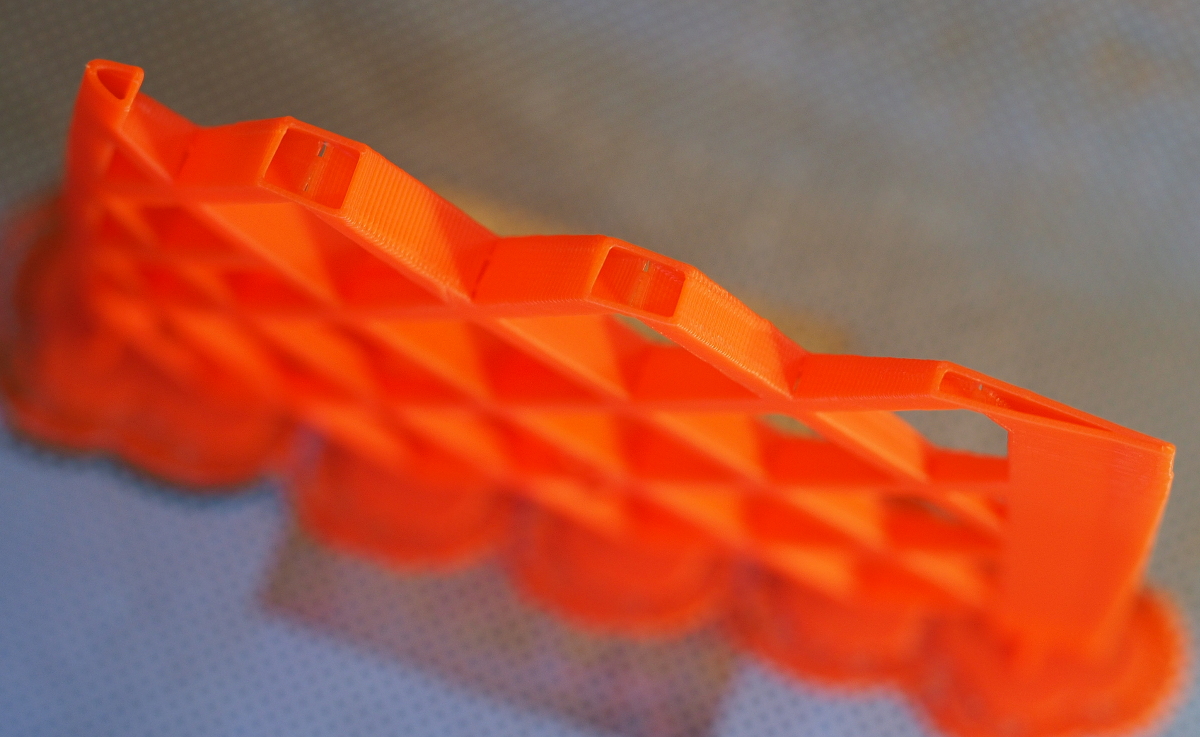
one that has to be printed as shell (wings - left image) - 0% infill and no horizontal surfaces
(thickness of the shell is one layer). Only this way you can achieve required weight of the plane.
→
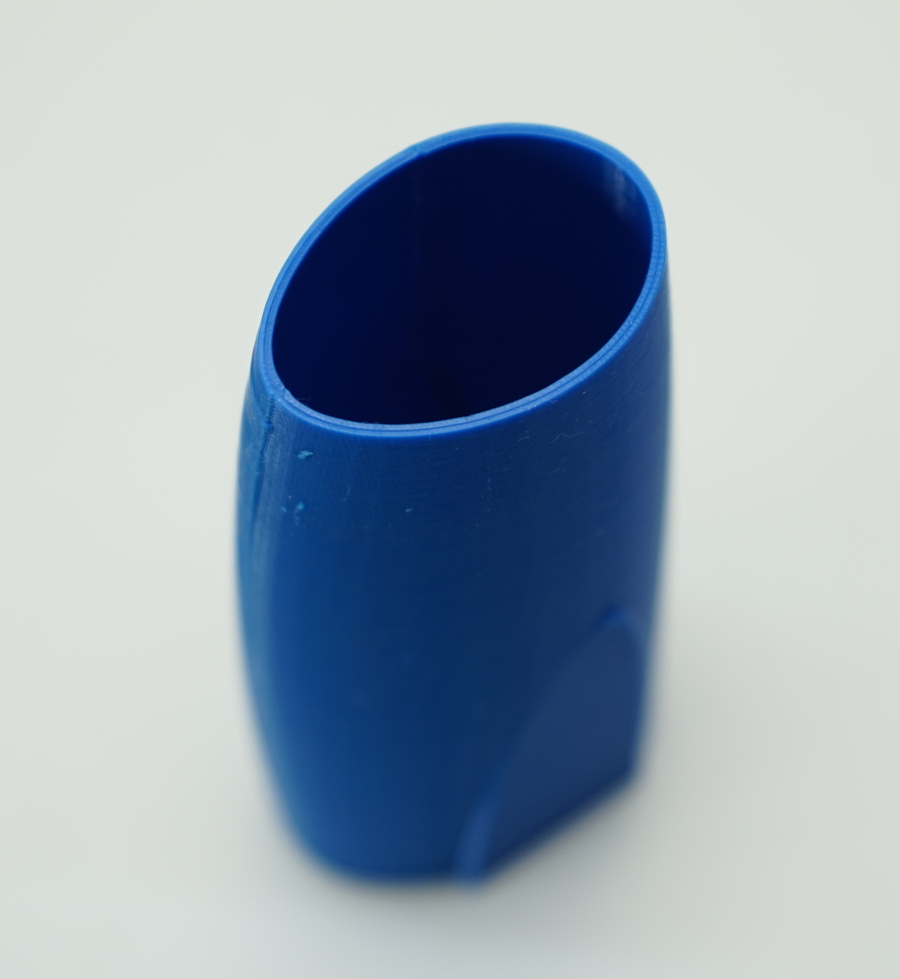
Second kind should be printed as solid (fuse and accessories - right picture).
This is common way of printing objects and these parts should be printable on every printer.
←
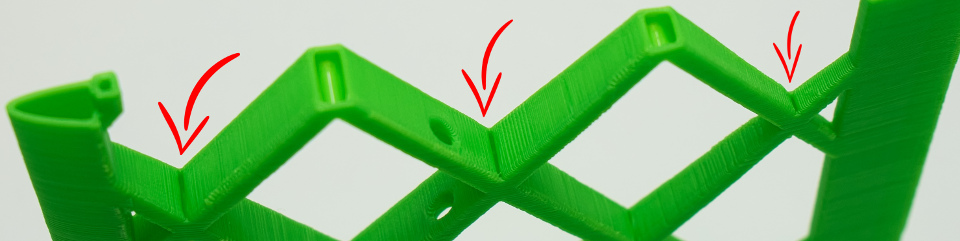
Because we are not printing horizontal surfaces there are small gaps in mesh X crossings.
This is perfectly normal.
You can use any material you like, the limitation is high temperature from the iron when covering assembled parts. Heat from the iron can deform the parts. Although I was not able to damage any parts and I tried to cover with foil many materials (ABS, PLA ...), please test film covering on you testing part as you may use different material than I do.
One of the goals when designing KRAGA models is to use minimal or no support during printing. Removing support after printing is big pain and you can easily destroy your part. That is the reason why you should use default orientation of all parts during printing. There are only two parts from whole plane which require support, these are from plane fuselage and are printed as solid. The rest of the plane should be support-free.
Basic settings
Nozzle: 0.4 mm
Layer thickness: 0.19 mm
Rafts: yes
Check out printing settings shared by others.
How to get carbon spars
Best way is to visit some local RC shop nearby.
If that is not an option for you, here are some online shop links:
How to assembly
Assembly is very easy and fast similar to stringing needle to a thread.
To assembly the plane you have to glue together parts that you printed out and parts that you bought separately
(carbon spars, hinges - they are not included as part of the sold product). Whole assembly process is described in higher detail in a build guide
which can be downloaded on plane detail page. Another option is to watch assembly guide video.
How to cover
It is important to test film covering on testing part before you start. Covering of 3D printed parts is a bit special because of thermal expansion of plastics. When heating up the plastics it expands a bit. Covering is then actually done on slightly enlarged wing and when the wing is cooling down it shrinks back. But the covering foil does not and that causes wrinkles.
That is why some covering materials work better than other. Some are very stretchy and
have the capacity to shrink down even more together with the printed wing as it is cooling down and shrinking and some do not.
I tested couple of brands and in my opinion Solarfilm Lite is the best option for 3D printed planes from Kraga.
Unfortunately the company Solarfilm stopped production, so this material is very hard to get.
Other good options (which I did not test myself) should be AeroLITE rolls and Coverite 21st Century Microlite.
If you cannot get one of the above mentioned covering materials, then in general lightweight options of covering materials work the best.
For example Oralight from Oracover or UltraCote lite.
I strongly advice everybody to use trimming iron instead of standard sized one, because with trimming iron you don't heat up the wing that much.
Another very useful tool is covering film adhesive for example Cover grip from Deluxe materials.
When using covering adhesive the foil sticks better and one doesn't have to heat it up that much, what again prevents expansion of the wing.
Finally the technique is also important, but more about that in this how to video: