News
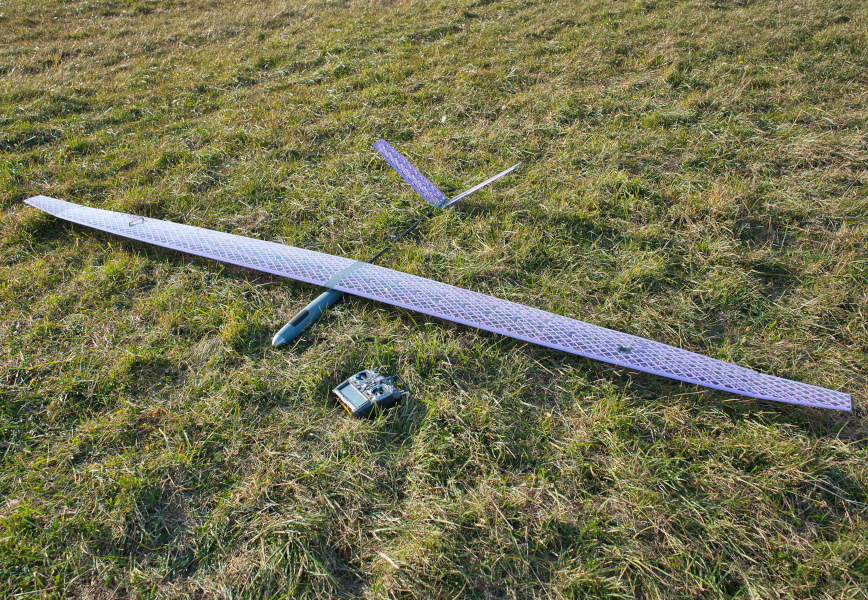
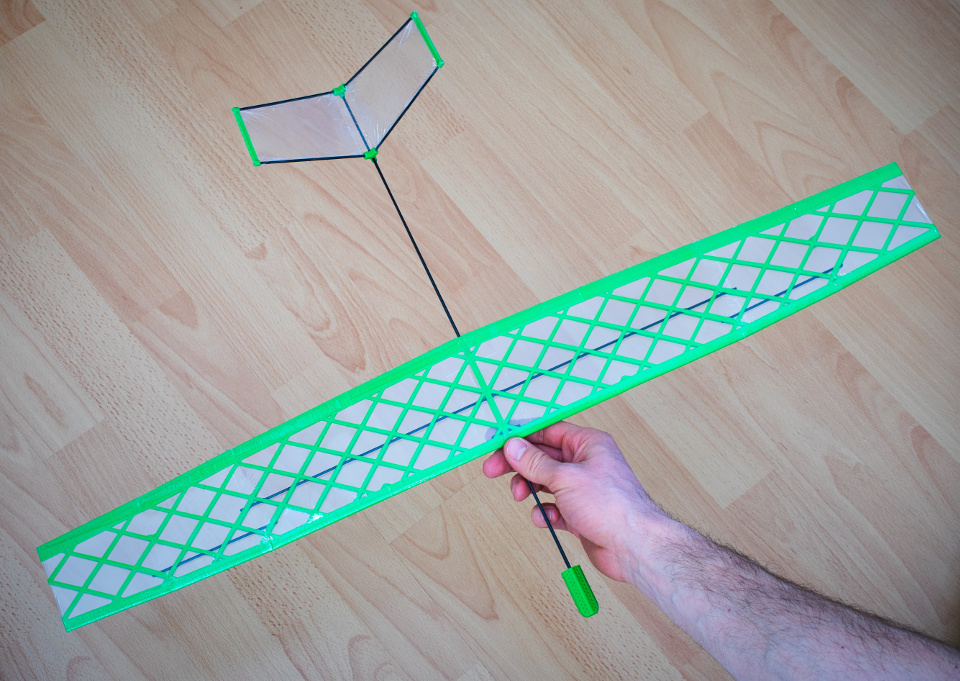
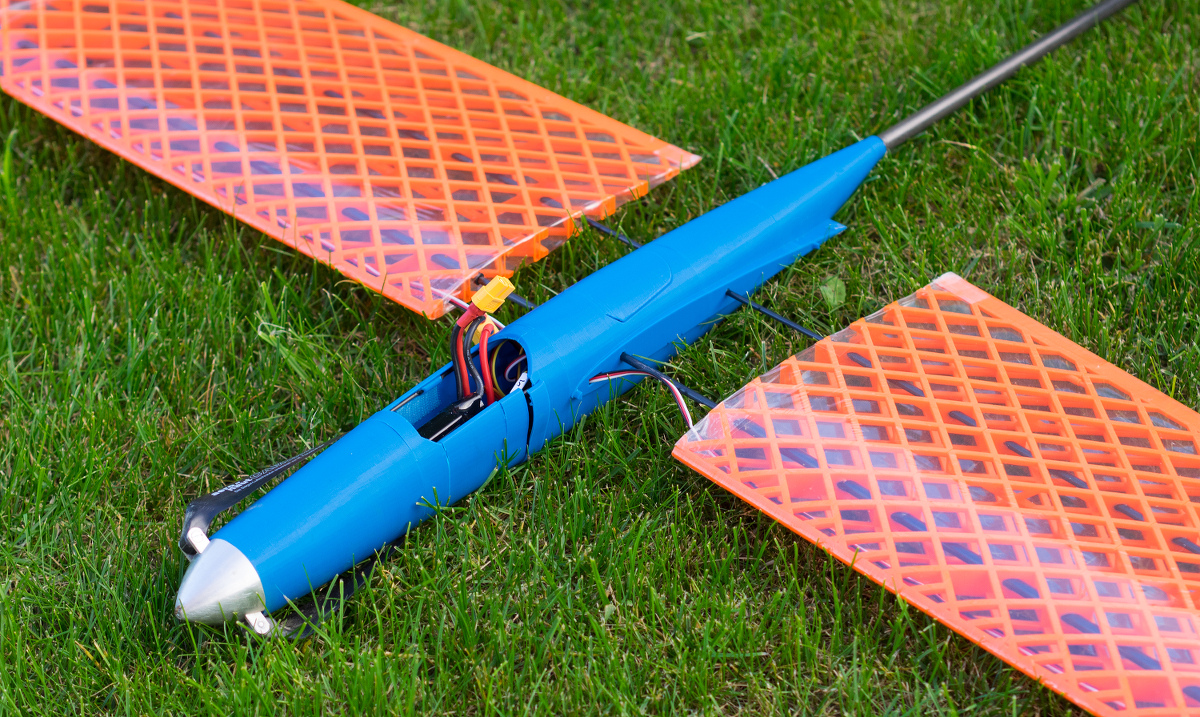
KRAGA Roa II
date: 9th April 2022
This is it. This is the day when I can finally release this huge glider. It took me many years, and I have to say, that I almost gave up couple times, as you could see also in one of my videos.
This plane is not for everyone, it takes time to print it, build it, and cover it.
I don't know what it is, that is so attractive about big planes. We somehow always want more.
So this is it, the biggest plane I was able to design, perhaps too big.
I'm still not happy with the result, but on the other hand I almost newer am. I hope that you will like it. You can read more about Roa II here.
KRAGA Kodo II
date: 22nd January 2022
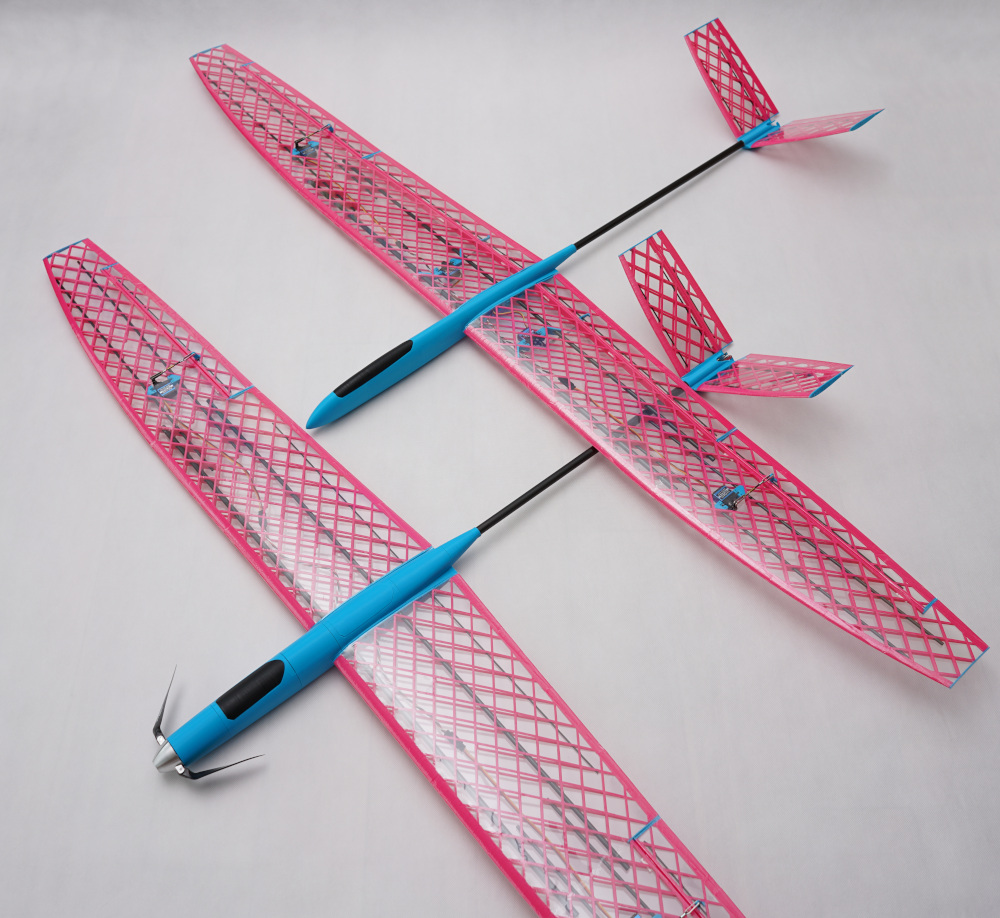
Kodo was my first commercially available 3D printed plane. It was a proof of concept, proof that 3D printing can be used for building affordable yet capable and fun RC planes.
Since then I designed many new planes, gained a lot of experience and improved many things in my designs. It was about time to use everything I learned and create second iteration of this great little glider.
Frankly, first iteration of Kodo was a bit of surprise in a positive way. I was really happy with how it behave in the air. That is why I did minimal changes in aerodynamic department. I just tweaked it a little to achieve even more friendly behavior.
Most of the changes were done in construction department, to make it stronger and more practical in every way. Same as couple years ago, I'm again delighted with the result. Check out at least some of things I improved here.
New covering tutorial
date: 12th July 2021
Unfortunately the company Solarfilm stopped production and covering material Solarfilm Lite, that worked the best for me and that I advised to everybody is no longer available.
I did a lot of testing with many covering materials and tried many techniques and I believe that I found acceptable solution. I made new covering tutorial video, where I explain what is the problem and what works the best for me.
Hopefully it will be helpful.
This is what I did for a year
date: 3rd November 2020
A year ago, after failed first launch of 3.4 meter big glider I said, that I'm giving up and that I'm not going to continue working on it.
Well, in the end I did continue. Thanks to one of you I figured a simple way, how to make make it work. A few weeks ago I tested the solution and found another problem on different place. This time the fix obvious. You can watch the video to find out more details.
As for plans for near future, recently I found out, that the company, that is producing Solarfilm Lite covering foil, stopped the production.
As this was in my opinion the best option how to cover 3D printed airplanes, I tested a few other options and I will test some more. I'll make a video about that.
Then I will definitely work on next generation of Kodo and after that finally back to ROA II.
I failed
date: 18th August 2019
The big glider I was promising in previous news article didn't work out.
Long story short, there are strength issues which I was not able resolve. At least not for now.
I'm explaining more in my youtube video or you can read more about this glider called KRAGA Roa on my page here.
What now?
I have couple options, but most probably I will work on second iteration of KRAGA Kodo. There is a lot to improve.
What is going on
date: 3rd February 2019
It is quite a while since I gave you an update on what is going on with KRAGA models. Since many of you are asking this question via email I decided to write brief note here.
No I'm not having a break from designing new planes quite the opposite. I'm working hard on a new electric glider.
Yes another glider. The reason why it is taking me so long is that this glider is pretty big.
I don't want go into details but I can share with you that wing span is over 3 meters. This brings some challenges and things take longer. More time designing, more time printing, much more time re-printing over and over again ...
On top of that I'm making it FPV ready.
In my wild dreams I imagine releasing it in April this year if everything goes smoothly.
Maripi update 1.3
date: 25th October 2018
This time it is just a small fix and improvement.
In previous update I reinforced fuselage where wing joiner spars are inserted to prevent possible cracks and distribute the forces better.
That caused some small issues because I did not adjust accordingly joiner pins on fuse_2 part and as a result of that
it was not possible to join together fuse_2 and fuse_3 without breaking the joiner pins.
Additionally I added endcaps on inner side of the elevator. The reason was not cosmetics but rather safety.
Under some circumstances it was possible that elevator would get stuck against the fuselage near elevator trailing edge.
Inner endcaps solve this issue nicely.
List of improvements:
- fixed issue with pins on fuse_2 part that were interfering with fillets on fuse_3 part
- added endcaps on inner side of horizontal stabilizer to prevent possible elevator jam

These changes are available for download as version 1.3 in my account section.
Maripi update 1.2
date: 4th August 2018
My last improvement of firewall (version 1.1) was not sufficient enough. Although carbon spars are protruding more into firewall, the fillets that I added were too thin.
On top of that I got some report about cracks near motor mount screws. I had to act.
Once I started I took my time and updated what I could based on your input mostly from RCgroups.
In the end I touched 70 files and this is the list of my improvements:
- greatly improved motor mount (fuse_0 part) and added also heavy duty option
- better front hatch attachment - it will stick better to the fuselage
- relocated hooks for wing attachment to be easier to access and made the hooks bigger
- fuselage servo plate is now attached using two carbon spars instead of just one
- landing gear fuselage attachment points are now stronger and distribute the forces better
- fuselage is now thicker and has some fillets where wing joiner spars are inserted to prevent possible cracks and distribute the forces better
- wing and control surfaces have improved built-in printing support legs
- wheel shoes are a bit stronger now
- added shoes for 50mm wheel
- added support for Du-bro 117 standard hinges
These changes are available for download as version 1.2 in my account section.
KRAGA Tere
date: 13th March 2018
Initially I wanted to design something small that I could fly with my son and light in him perhaps a spark of interest for this hobby :-)
After all this kind of plane is exactly what I started with as a kid. It was meant to be couple weeks project which I would not publish at all.
But then I realized that this plane might be a trial for everybody who is interested in my designs but Kodo or Maripi is too big challenge for the start.
Or that there are other dads who would enjoy such tiny project with their kids.
As always it turned out to be much bigger project than expected. And if you add to it my newer ending urge for perfection, you end up
with months instead of weeks of work.
It was silly of me to think such a tiny plane will be super easy to design. Far from it.
Because all control surfaces are fixed everything has to be spot on. That means a lot of testing, redesigning, reprinting and all over again.
I have to say that I learned a lot. It is still not ideal but at some point I had to stop and finally let it out. I'm so happy that it is finished now and I can start with new design. Best of all, this tiny thing is simply unbreakable. At least I was not able to break it easily (I managed to do it after all :-) ). It hit the ground countless times, bounced of it, rolled over ... and then I just pick it up and throw again.
For more technical details about Tere click here.
And don't worry, you can always print new one :-)
Maripi motor mount improvement
date: 27th February 2018
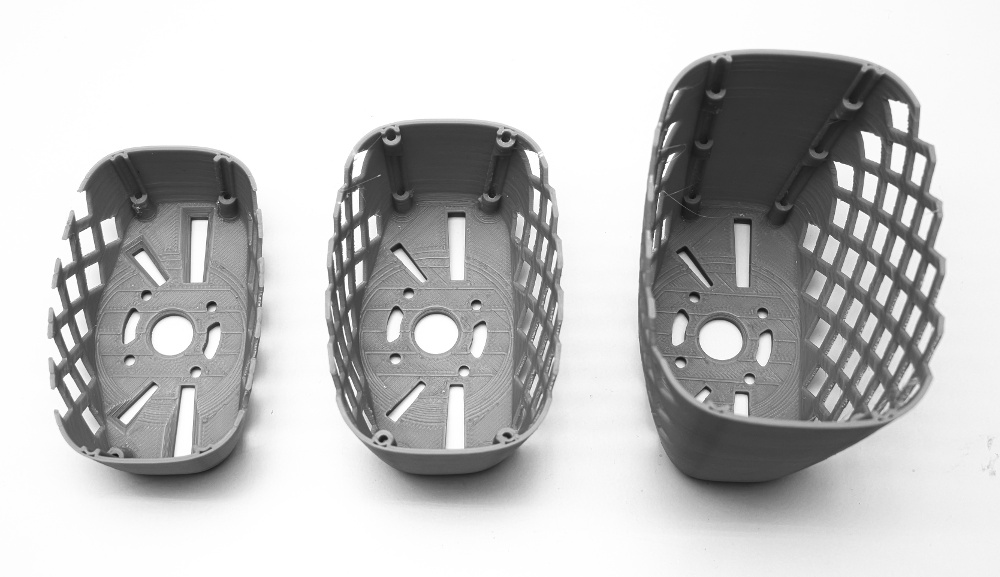
Recently I found out that one of you had very bad experience with his Maripi when during his third flight the firewall (a.k.a. motor mount) completely broke off.
Real reason for this issue is not clear, there are more possible reasons (high vibrations, temperature, rough landing, carbon spars not inserted deep enough during build).
But one thing is sure, I did not design it the best I could.
Due to the fuselage curvature it was difficult to let carbon spars protrude into motor mount plate. Because of this whole weight of motor and propeller was hanging on thin fuselage wall.
Now it is possible to insert carbon spars more deeply into part fuse_0_SK3_35xx. On top of that I added some fillets here and there and shaved some weight to balance it.
I also did some minor build guide improvements based on your inputs. Thank you all for that. These changes are available for download as version 1.1 in my account section.
PS: something new is coming soon ;-)
Wing covering tutorial
date: 14th October 2017
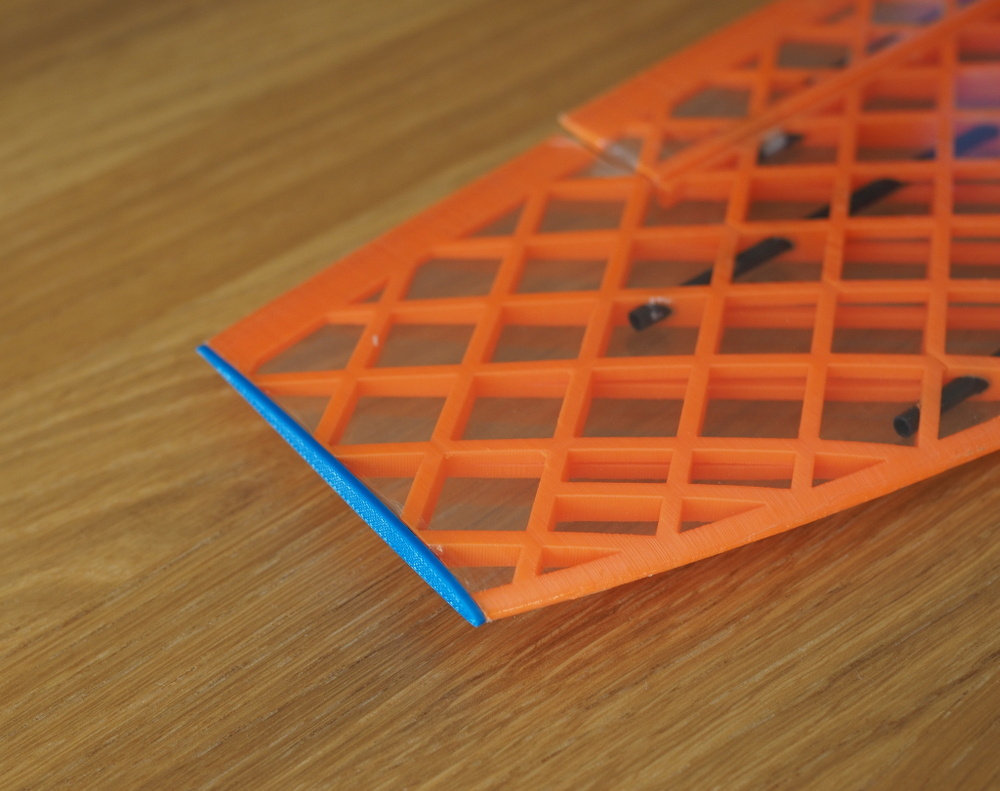
I was requested many times to do some kind of covering demo/tutorial so here it is.
I used one of my many scrap wing pieces and covered it with red Solarfilm Lite foil.
The wing was printed with ABS plastic. For PLA you should not work too long on one place and move to the opposite side to let it cool down and avoid deformation.
Temperatures I used in the tutorial work for the materials I used, it might be different for you. Remember to always experiment on some test piece to find out what temperatures work best for your materials.
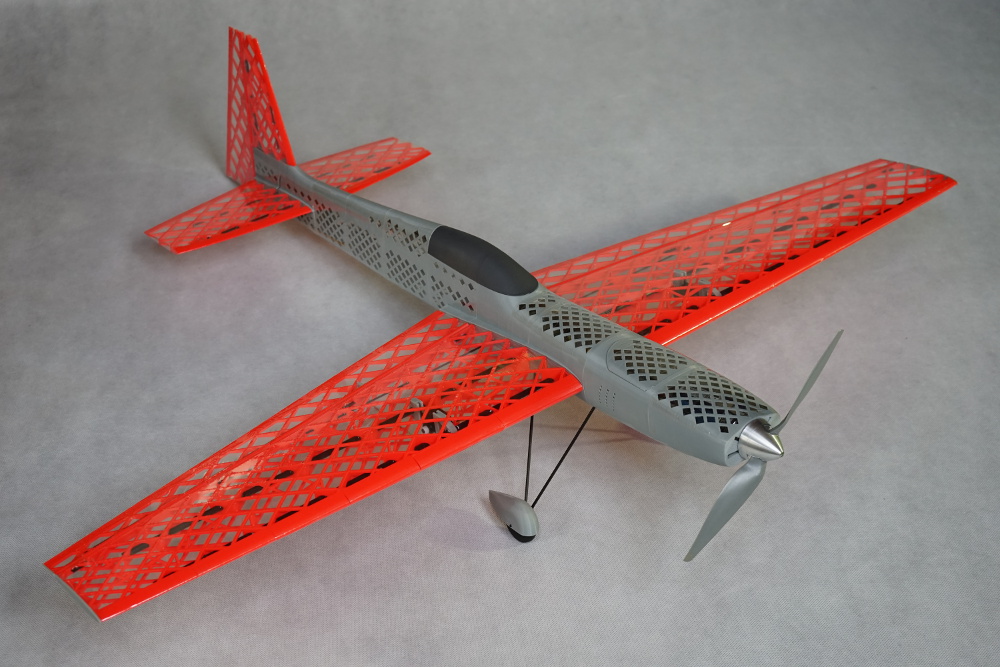
KRAGA Maripi
date: 25th August 2017
Yes. It is finally done. It took me almost a year to finalize. It gave me fair bit of frustration at times but more importantly great feeling of satisfaction.
One of many things I wanted to learn is flying at least some basic acrobatics. So I pushed myself out of my comfort zone this time not only when it comes to flying but also designing. This was my first acrobat design ever. That is why I asked a very good acrobat pilot Michal Schreiner for help. With his valuable input I created Maripi.
The goal was to create something smaller than Kodo so that it could be printed faster. As always it had to be easy to fly. Capable of acrobatics. Suitable for beginner acrobat pilots like myself. The result is exactly what I wanted to achieve except for one thing - shorter printing time :-). Fuselage design was really demanding this time and took me most of the time. I needed fuselage with big area to support the plane in different maneuvers. That means I had to tackle classic problems like cracking, warping and weight again. I learned a lot during this design and I'm happy with flight characteristics of this plane. Hopefully you will like it too.
I implemented also couple improvements in wing design. Wing is now lighter relative to the design on Kodo.
But more important change is new leading edge design. Thanks to that the airfoil shape is more exact.
The airflow is laminar on bigger part of the wing. You can find more about Maripi here.
And yes, it does have wing tip covers included ;-).
Happy flying
Snow landing tutorial
date: 24th April 2017
I'm getting millions of requests every day asking me: "Tomas, please tell me how should I land my Kodo in snow ?" So instead of writing million replies, I decided to make this short tutorial :-).
To be a bit more serious here, last Friday we got some April snow. I decided to use that and the video is documenting my hike. The weather was very nice, but the wind was blowing madly especially on the top where I was initially planning to fly.
I found small area protected by the trees and decided to give it a chance. As expected, the wind was not only too strong, but also very turbulent. The rest you can see in the video.
Enjoy
Changes in CG settings & new page for sharing print settings
date: 15th March 2017
After some initial feedback I revised CG setting and moved it now to 61mm from wing leading edge for maiden flight.
As it turned out, I'm flying on 62mm, so previously advised 63mm was quite dangerous for first flight.
Don't worry, no Kodo was harmed due to this inaccuracy :-) .
I also added some general settings to the build guide as a starting point for maiden flight.
There is a new page where you can you can check what printing settings are successfully used by other users. Hopefully more of you will share your settings and it will be more and more helpful.
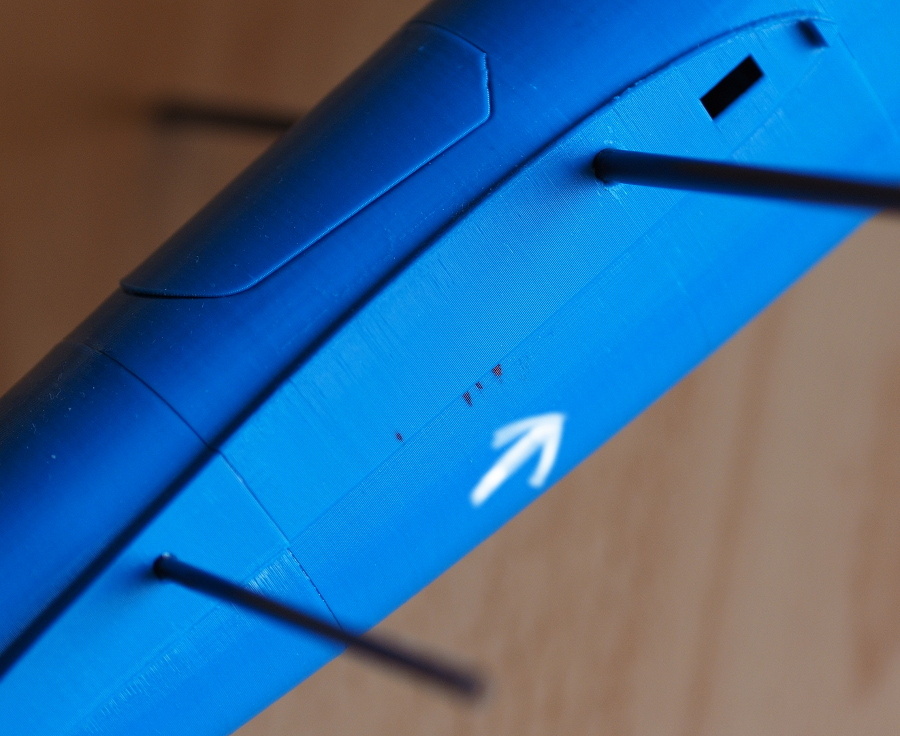
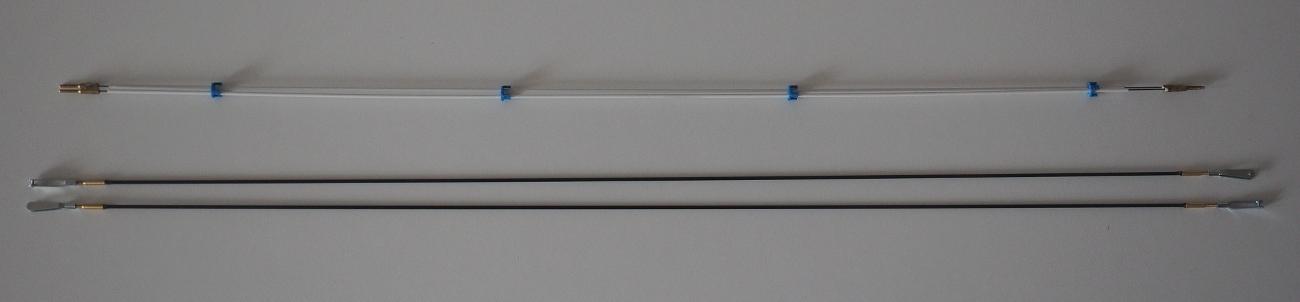
I got couple of questions related to the tail linkage system. I recommend two options, either flexible push rods (the white ones on the picture) or home made ones from 2mm carbon tube.
Flexible push rods are less time consuming to do. Carbon ones offer better movement control and responsive feel when flying.
Updated build guide is available for download in version 1.4
Was it santa?
date: 23rd Dec 2016
As I was flying today with Kodo I suddenly heard some strange sound. It was something like jingle bells. I thought to myself "maybe something with motor" so I landed immediatelly and checked the plane.
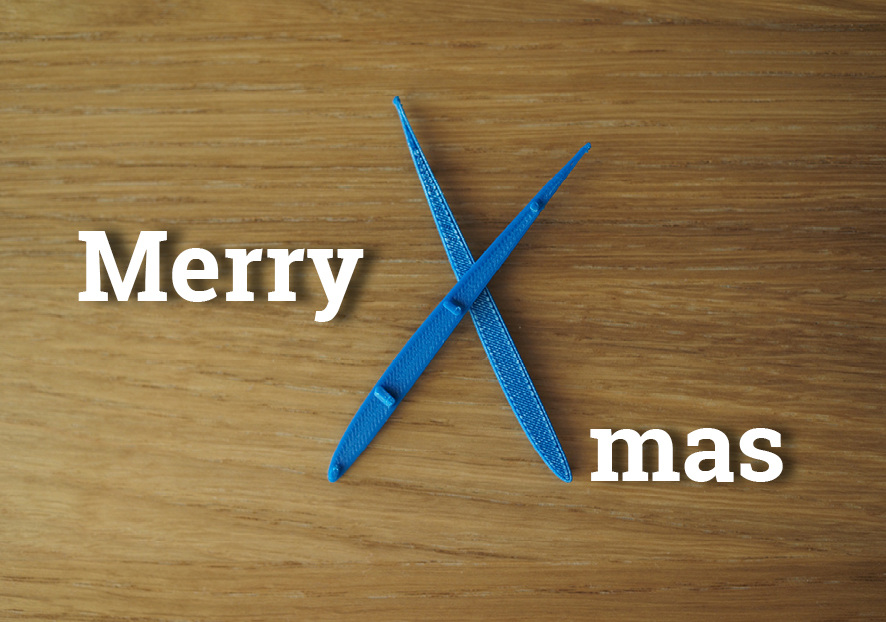
The motor was fine but there was something strange on the wing tips, something I'm sure many of you would like to have on your Kodo as well ;-)
One possible explanation might be, that Santa was testing his aircraft near to Kodo's test track, he saw it and wanted to reward it for beeing such a good airplane whole year ;-)
One way or another, wing tip end caps are available for download in version 1.3
Enjoy the Christmas
Fuselage servo mount plate improved
date: 16th Oct 2016
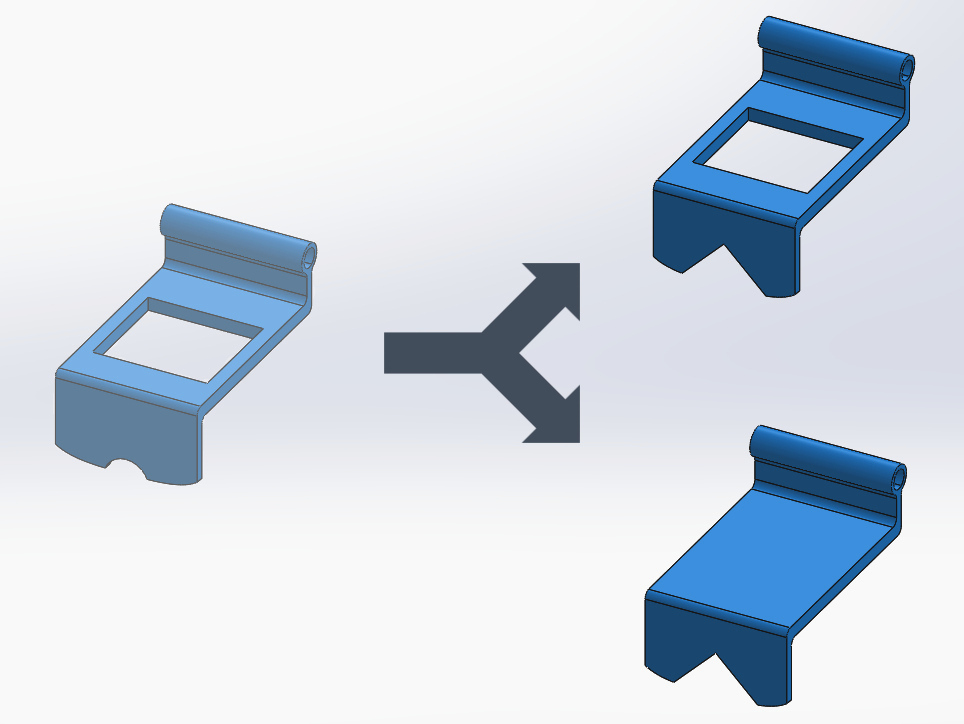
In case you would like to place your receiver further back in the fuselage to save same space in the front, it was hard to lead cables around servo mount plate. Now you can lead the cables under the plate through bigger hole in plate legs.
For those of you, who are using different servo size or placement configuration I added option to print mount the plate without servo cutouts.
(These changes are available for download under version 1.2)
Kodo - first serious crash
date: 8th Oct 2016
Recently I was doing some tests with electronics in Kodo's fuselage, trying different kinds of ESC because I had some issues with mine. This moved my CG on the plane so I decided I will do more experiments and I will leave it a little bit more back (67mm from LE). On the way for some shopping with my wife and son I took also Kodo promising only 10 minutes delay. I have to admit I wanted to show off in front of my little son because he is showing great interest in planes lately. Coincidentally due to my fault I wiped out recently all my settings from my transmitter so I was flying with new settings.
After little bit of flying I got into stall and began to fall down in uncontrolled spin. Kodo fall directly 15 meters nose down. Then there was this quite for couple seconds, realizing what just happened.
I thought that Kodo will be just a pile of broken plastic and carbon. To my surprise only thing that was broken was front part of the fuselage. Wings were detached from the fuselage (what for sure helped to consume part of the energy) but they were perfectly fine same as the tail. In the end I just need to reprint front part of the fuselage and I can reuse complete middle and back section from original fuselage (actually I'm writing this while my printer is quietly buzzing in next room - printing the parts).
This was in total my third serious crash with a plane build using this kind of technology. First two crashes were with different planes but both of them were quite severe and wings were always perfectly fine after the crash. Even if wing tip was first to touch the ground it was always fuselage which got broken and wings absorbed the energy nicely.
These are the moments when I feel like it was worth to spend so much time designing and trying all kinds of wing structures. Pity that this was the first time my son saw me flying live (he saw me only on youtube before).